Assume you are a home user and you want to setup gitlab on a server. However, gitlab consumes signifcant memory and you need to pay at least 50-100$ per month to run the server on cloud providers. At the same time, you don’t have any public IP address, but you can get one for 5$, or use a very basic VM.
This post explains how to setup the gitlab over nginx so that for 5$ and on an old laptop in your home, you can have a very responsive gitlab server. My architecture is as follows, but you can also use a similar one.
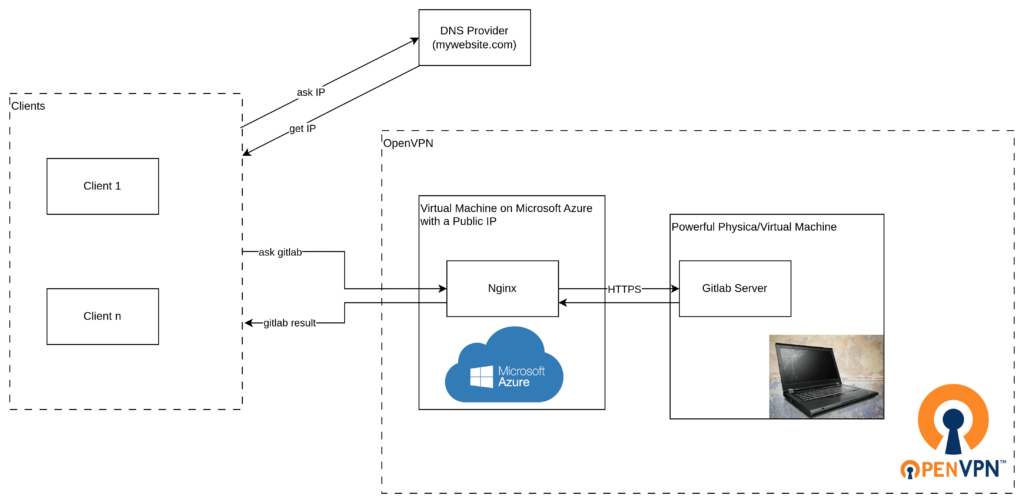
1. Setting up OpenVPN
To tunnel the traffic and put the cloud virtual machine and the gitlab machine on the same network, I installed the OpenVPN and automatically configured the client. Please refer to ink https://github.com/angristan/openvpn-install to setup the OpenVPN automatically.
From my experience, crontab and tmux work very robust, so I simply added this entry to the crontab:
* * * * * tmux new -s vpn_azure -d bash -c "openvpn --config /etc/openvpn/my_openvpn_file.ovpn"After you sucessfully connec to the VPN on the client, note down the IP address so that you can route the traffic while you are configuring the server. You can use ifconfig to list the interfaces and get the OpenVPN virtual interface IP address. Example output:
tun0: flags=4305<UP,POINTOPOINT,RUNNING,NOARP,MULTICAST>  mtu 1500
        inet 10.1.0.2  netmask 255.255.255.0  destination 10.1.0.2
        inet6 fe80::2834:ea38:6940:32cf  prefixlen 64  scopeid 0x20<link>
        unspec 00-00-00-00-00-00-00-00-00-00-00-00-00-00-00-00  txqueuelen 500  (UNSPEC)
        RX packets 870998  bytes 1148232242 (1.1 GB)
        RX errors 0  dropped 0  overruns 0  frame 0
        TX packets 189359  bytes 15153005 (15.1 MB)
        TX errors 0  dropped 0 overruns 0  carrier 0  collisions 0
2. Setting up Nginx on the server
We need to setup Nginx so that it forwards the requests to the gitlab. To make it secure, we need to also enable HTTPS. First allow the HTTP and HTTPS traffic through the firewall, for more information you can check here https://learn.microsoft.com/en-us/azure/firewall/basic-features
Next step is to install Nginx.
sudo apt update
sudo apt install nginx -y
Then, we need to configure it. Edit file /etc/nginx/sites-available/gitlab` and add your configuration:
server {
    listen 80;
    server_name gitlab.example.com;
    location / {
        proxy_pass https://10.1.0.2;  # Forward requests to the specified IP address
        proxy_set_header Host $host;
        proxy_set_header X-Real-IP $remote_addr;
        proxy_set_header X-Forwarded-For $proxy_add_x_forwarded_for;
        proxy_set_header X-Forwarded-Proto $scheme;
    }


}
Then, i removed the default to keep only this one, but you can keep it. I am not sure if it works when you do not remove it.
rm /etc/nginx/sites-available/gitlab
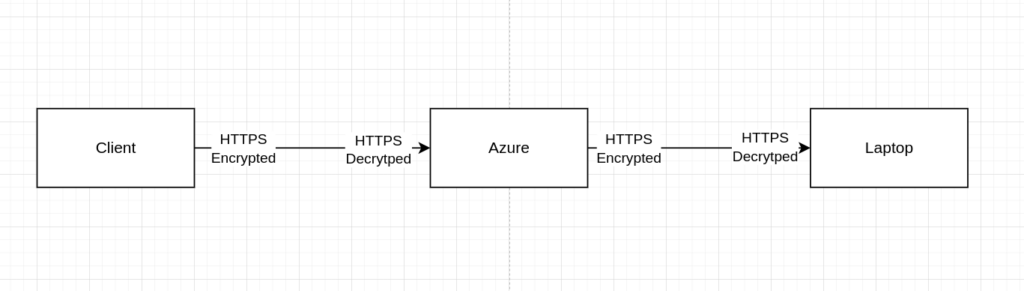
touch /etc/nginx/sites-available/gitlabIt is important to note that, HTTPS of the Gitlab and HTTPS of the Nginx server are completely irrelevant. So, the logic is that we setup 2 different HTTPS servers. Like in this image:
Since we set up our configuration, we also need to enable it. This is done by creating a symbolic link to the target directory.
ln -s /etc/nginx/sites-available/gitlab /etc/nginx/sites-enabled/gitlab
systemctl restart nginx
At this point, the redirection is ready to go. However, we still did not set up the SSL certificates for the HTTPS. I use Let’s encrypt here. It is pretty straightforward because certbot changes the nginx configuraiton files to include the SSL certificates and everything. Just run these commands, and you should see the gitlab file has changed with the new HTTPS configuration:
apt install certbot python3-certbot-nginx
certbot --nginx -d gitlab.example.com
systemctl restart nginx
# When done, you can check the configuraiton files if they are updated with the SSL configurations
# You would see new code generated by Certbot
cat /etc/nginx/sites-enabled/gitlab
3. Setting up Gitlab
This is the most straightforward one. I assume you already have an Ubuntu machine. If not, please create one. I used Ubuntu. 22.04. What you need to do is simply following instructions in this page https://about.gitlab.com/install/#ubuntu. In short, the codes are:
custom_ext_url="https://gitlab.example.com"
sudo apt-get update
sudo apt-get install -y curl openssh-server ca-certificates tzdata perl
sudo apt-get install -y postfix
curl https://packages.gitlab.com/install/repositories/gitlab/gitlab-ee/script.deb.sh | sudo bash
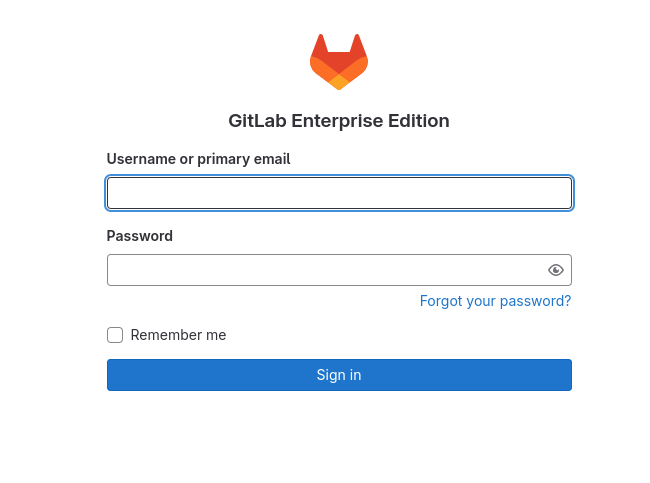
sudo EXTERNAL_URL=custom_ext_url apt-get install gitlab-eeAfter executing the codes, you can go to the address gitlab.example.com, and you should see gitlab is up and running:
You can check this link out for the e-mail configuration.
Leave a Reply